
These are incredibly simple to make, easy to tailor to your
own tastes, and use items that you probably already have around the house. My
son and I made some as gifts last Christmas, so why not make some together with
your kids to give as gifts this year?
You will need:
Picture frames
PaintGlue
Glitter and / or other embellishments
Dry-wipe board markers

Start by choosing your frames. They need to be at least A5 (or have a 10 x 15cm / 4 x 6” window) but you could make a larger size if you prefer. I’m going to walk you through 2 different styles here ~ Shabby Chic and Glam Goth ~ but as I said you can adapt yours to suit your own décor, or the décor of the intended recipient.
Let’s start with the Glam Goth frame as it was the easiest!
First cover your working area with newspaper. Remove the
glass from the frame and spray the frame liberally with black gloss spray paint
(I used a car spray paint from my local pound shop). As soon as the entire
frame is covered, sprinkle the glitter on to the wet paint and leave to dry.
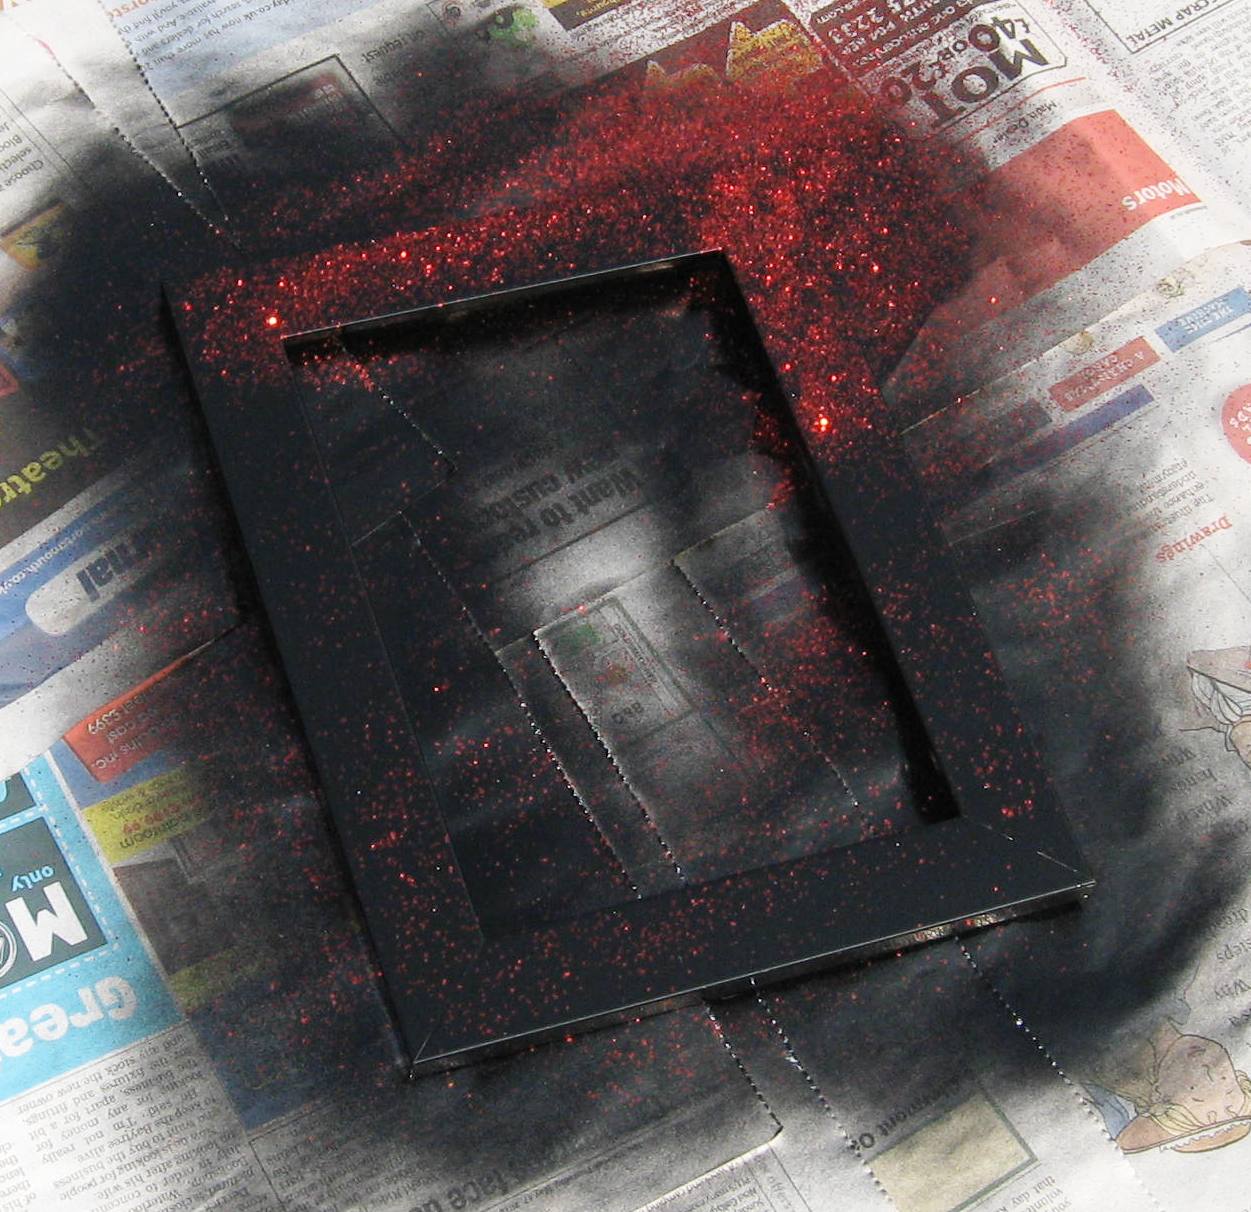
I
went for a heavier covering across the top edge of the frame and just a light
sprinkle on the bottom. Once the frame is dry, shake off any excess glitter.
You can add a coat of spray varnish if you like but I didn’t bother. Now all
you need to do is print off the appropriate skull pdf, or of course you can design
your own version. Cut this to size and pop it in the frame, then simply stand
or hang where you need it. Tada!

And now the Shabby Chic frame
I used a sample pot of ordinary household emulsion to paint
a plain wood frame. While the paint was drying I printed off some little roses
that I found on the Graphics Fairy website and carefully cut them out. You
could also use wrapping paper or wallpaper flowers if you have some that you like.
When the paint dried I used pva (white) glue to stick the roses around the top
corner. Print off the appropriate rose pdf, or design your own. Tada, mark 2!

So you can see how easy and effective this craft is. I have
included the pdfs I used to make these particular versions but it’s a fairly
easy task to design your own, just please do not take images from the internet
that belong to somebody. There are plenty of sites where you can get
copyright-free images for free, I used The Graphics Fairy for this craft. Or
why not get your kids to draw something special?
Other suggestions ~ how about using white spray paint and pink glitter? Or decoupage the frame with old damaged book pages?
No comments:
Post a Comment